Notice
Avatar comes with a read-me manual. Its a HUD that you are supposed to attach and then you can read it like a book.
It contains the main information on how to set up and use your avatar, however if reading it in SL isn't very convenient for you, this article provides a duplicate of that.
Keep in mind that none of the text been corrected (yet) for web viewing, there is no links inserted. The buttons it refers to on the side - it refers to the buttons on that SL hud that you can get and wear.
Later I'll adjust this guide for the website and add pictures to it as well, but for now the second-life manual HUD version is superior.
Table of Contents
- Click on the topic that interests you or the > button to proceed to the next page.
- You can click and drag on the Manual HUD's header to move it akin to any regular window.
- Additionally the book icon will minimize the HUD. You can't drag the book icon.
📖 Table of Contents
About Us
Thank you for purchasing our Avatar, brought to you by The Gateway of Realities team.
We are a small group of independent creators who are determined to bring our beloved creatures from other worlds to our reality. Intelligent exotic beautiful species, cultures, technologies - is a never ending source of our inspiration. We strive for anatomical correctness and, with all our being, we embrace their biological and sexual part.
We make all sorts of art, animations, and we're even working on our own Multiplayer Co-Op Adult Sandbox game, powered by Unreal Engine 4, it features Dragons and other creatures akin to our avatar creations.
Just as a reminder, 🔞 you must be over eighteen years old to follow us, talk to us, and use our avatars.
With love,
Salireths and Hopfel.
Features
Customization
We put our hard work to make sure that our avatars are customizable to the max! Modular meshes, bakes on mesh layers, appliers, devkits, tutorials - all to help you make a truly unique appearance.
Animations
Our avatars come with our own full-featured, configurable AO solution that is capable of playing avatar-specific animations for the face, tail, genitals, and overriding all default SL body animations.
Genitalia
We make our avatars support erotic RPs "out of the box". All anatomically-required orifices part of avatar body, have controllable stretching animations. There is also a functional "animesh" male genitalia, with a unique approach to animating liquids.
Scripts
We have a scripting system that is modular, versatile, and shared across all our avatars, all controlled via user friendly commands. Our HUD system supports user-added presets and can even be fully re-configured via notecards - users can add new buttons with new functionality.
Future
With your support we can continue developing new features in the future, adding support for more fetishes that bring joy and love to our warm fluffy hearts!
Quick Start
Take a look at the folders you've received - each folder starts with the corresponding avatar name and follows this structure:
- Anatomy - Animesh attachments of genitalia and other systems.
- Attachments - Static (unrigged) attachments like horns and additional parts.
- Body - All the main rigged meshes.
- BoM Layers - Bakes on Mesh layers that are responsible for texturing your avatar.
- Clothing - Rigged clothing meshes.
- HUD - Heads Up Displays for controlling the avatar
- Library - Repository of textures and animations, full permission for maximum moddability.
- SL Body Parts - Necessary to wear default body-parts that affect the system avatar.
Our avatars are distributed with a lot of objects in complicated folder structure - something that doesn't fit into an unpackable box. This is why a nice idea to make a backup of everything you're changing in your avatar, so this way you can always return to "factory defaults" without redelivery.
Meshes
❗ Make sure you're in adult or moderate (nudity-allowed) region before wearing the avatar!
First, right click on the folder
This folder might have multiple Shape items for you to choose from, so pick whichever suits your desired look the most. You can also modify the shape, but we recommend to make a copy of it first.
Now to attach body meshes, open folder
❗ If after adding meshes you still see a system avatar, and body meshes have bright saturated colors with text over them - that means you need to update your viewer with support of Bakes on Mesh.
After adding a mesh you can also manually edit it, each mesh has up to 8 different faces that you can show or hide, make shiny or glowing, all for maximum customization.
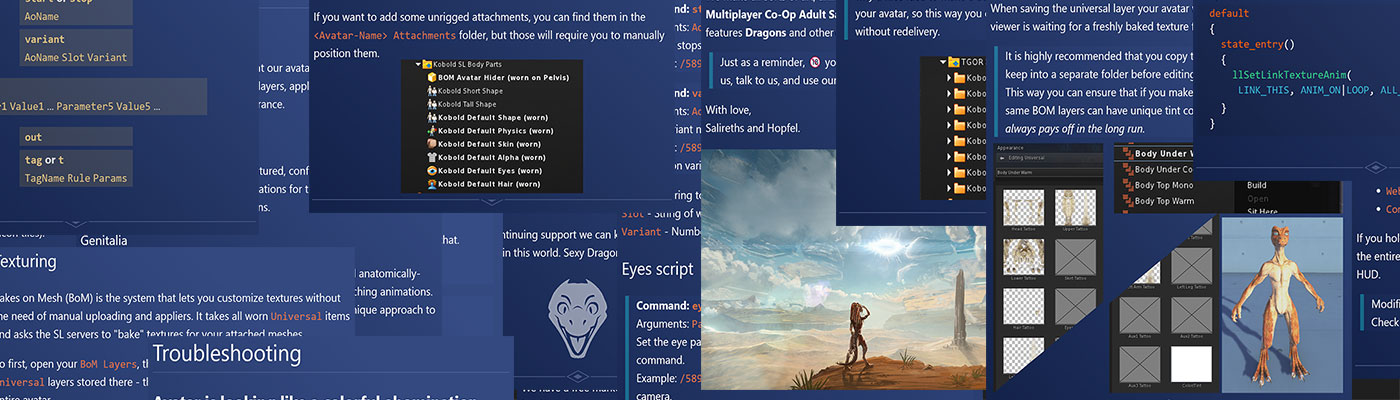
If you want to add some unrigged attachments, you can find them in the
Texturing
Bakes on Mesh (BoM) is the system that lets you customize textures without the need of manual uploading and appliers. It takes all worn Universal items and asks the SL servers to "bake" textures for your attached meshes.
So first, open your BoM Layers, then Base Skins directory. Add one of the Universal layers stored there - those apply "base coat" of color to your entire avatar.
The order which you Add the layers greatly affects the end result: its like applying coats of paint, they need to be done in order, with each new one covering up layers underneath.
There are other folders with layers that might be better applied second or third - those layers usually cover up a lot of the body as well, so adding them on top of smaller layers might not be desirable.
So with this, you can just follow your creative will and keep adding more layers! Second Life supports up to around 60 layers.
Colorizing
Most of BoM layers have blank, slightly warm or cool colors; they are devoid of a specific color so you can colorize them yourself.
To do that simply right-click on the layer and choose Edit.
In the Appearance menu scroll down until you see Color/Tint box. Clicking on it will let you change the color on that particular layer without affecting the rest.
When saving the universal layer your avatar will briefly appear grey while your viewer is waiting for a freshly baked texture from the server.
It is highly recommended that you copy the BOM layers you want to keep into a separate folder before editing them.
This way you can ensure that if you make different outfits in the future, same BOM layers can have unique tint colors. Good organization always pays off in the long run.
HUD Overview
The HUD can be found in
The triangular icon on the left top corner of your screen will reveal the full window.
There is no requirement to have HUD attached at all times.
Sections
Functionality of the HUD is organized by different tabs, which grant access to corresponding Sets, and allow you to modify the Properties of the currently selected Set.
❗ DB Memory is a counter for the script to stay within SL limitations. Don't ever let it get close to 100%, because it will crash - if that happens you'll need to hard-reset the database, losing all your custom Sets and Properties.
Buttons on the bottom:
- Reload config - for advanced modders.
- Refresh page - if something didn't show up.
- Website link - more information and guides.
- Community links - to stay in touch with us.
If you hold the first Reload Config button for 5 seconds, it will hard-reset the entire database. This will erase any custom changes you made in the HUD.
Modification of config files is only needed for advanced modders. Check our Website to learn more.
Sets
Sets contain pre-set values for Properties of the selected Section.
There are built-in presets, and additionally, user can manipulate, delete and add new ones.
To add a new set press the ADD preset at the end of the set list (might be on the next page)
To rename, move, export, import or delete presets, click the first special property SET CONTROL
Under SET CONTROL button, there is a texture picker and a number combo-box that are responsible for setting the icon of the set (a texture is split into multiple icon tiles).
Some Sections don't have sets to conserve database memory.
Properties
There are multiple property types - Counters, Combo Boxes, Buttons, Sliders, Texture pickers.. etc.
Left side of the property is its name, the right side is it's functional part.
The programmed command is sent when user modifies a property. All properties are sent at once when user changes the set.
Don't forget that there can be multiple pages of properties.
Penis overview
The penis can be found in
There can be multiple pre-made variants, as well as a customization template (check our website to learn how to customize them). Choose the one you like and select add.
❗ Penis needs to be attached to Left Hind Foot to properly work. It also has specific offsets that are listed in the provided notecard.
Penis uses a different approach to animate cum squirting, instead of particles it uses animated meshes. While effect it produces looks more immersive, the downside is that it's a bit trickier to use.
When using HUD to choose an animation for the cum-effects, you need to consider where the gravity is pointed in relative to the tip of the shaft.
Default cum animation, when your avatar is standing upright and erect, would be Cum Down as the gravity is pointing down regarding the tip of your penis. But if you change your pose you'll need to pick an animation that will look convincing in a given situation.
Experiment with your new penis before putting it into practice to impress your friends!
Updates and redelivery
To find out if there is an update available for your avatar, you can check the version number on your avatar folder, and see if it's different from one listed on our website or on SL Marketplace. Additionally there are announcements in our community SL group and Discord server.
To get an update or redelivery you need to log into your Second Life Marketplace account in your browser, under your order history, find the order with the avatar and click Redeliver Item link. The fresh new avatar folder should be automatically dropped into your Received Items folder in-world.
Our avatars are distributed with a lot of objects in complicated folder structure - something that doesn't fit into an unpackable box. This is why a nice idea to make a backup of everything you're changing in your avatar, so this way you can always return to "factory defaults" without redelivery.
After getting a new version, look into it's changelog notecard for further instructions.
* * *
As all our scripts are shared between avatars, it is possible that there are fresh bug fixes available. Those scripts can be newer than ones in your avatar, because we might haven't had enough time to integrate them just yet.
We have a free marketplace item listed separately (TGOR Avatar Engine) that has its only purpose to give you a folder with latest scripts that you can replace within your attachments yourself.
Similar to avatar folder, each script is labeled with a version number, which you can check by editing the scripted attachment and looking into it's inventory.
Help, community, guides, devkits
If you need help, want to stay in touch with updates or announcements, or just like to hang out with like minded fluffy and scalie creatures, we welcome you into our community!
- Discord Server - Place to contact us and hang out, get latest news about our SL and Game projects.
- SL Group - Place to receive announcements about SL projects.
- Website - Catalogue and information about SL projects, customization guides and usage tutorials. Check there if you're interested in modding our avatars to get latest dev-kits and export scripts.
- Twitter - Screenshots, art, and random work-in-progress stuff. Also a good way to contact Salireths.
Buttons that lead you to those places can be found on the side of the manual HUD.
Don't hesitate to ask Salireths if you're stuck with something. He is friendly and doesn't bite people that feed him. His online time on Second Life is sporadic though, as he's always busy creating various things. Discord and Twitter are the best places to reach him quickly.
With your amazing continuing support we can keep developing things that need much more love in this world. Sexy Dragons, for example.
Troubleshooting
Avatar is looking like a colorful abomination with a human inside of it!
- Your viewer does not support support Bakes on Mesh.
- Update your SL viewer.
Deformed, collapsed avatar with a face sticking out
This is the unfortunate consequence of having Animesh attached, in our case, penis. There are workarounds to make it behave:
Editing appearance or attaching anything while wearing an animesh might break the avatar in some viewers.
- Right click on yourself and choose Reset Skeleton or relog.
Penis just deforms the avatar while it is worn, and solution above doesn't help.
- Edit your penis, and under Features Tab, make sure Animated Mesh checkbox is enabled. Reset Skeleton afterward if needed.
Penis animations are playing on the avatar, and can even persist after detaching it and resetting the skeleton.
- That might happen if you incorrectly modify !ANIMS notecard on the penis, making it play animations on the avatar, instead of itself. Make sure all penis animation slots have A_ prefix in their name. After that is fixed, use Reset Skeleton and Animations or relog.
White Eyes
- Missing texture.
- Just a sanity check, try reapplying the texture.
- Eyes become white immediately after I apply texture
- Then it's a permission issue, make sure the prim the eyes are linked to is Mod-Copy-Transfer, otherwise the script that moves eyes can't get the current eye texture from them, and thus corrupts it. For this reason don't link eyes to the rest of the avatar, keep them a separate, full permission attachment.
Cumming animations shooting wrong direction
Check the Penis overview page in this manual.
Can't attach Penis right
Penis needs to be attached to Left Hind Foot. Check the notecard in the same folder as penis attachment to get its location and rotation for your specific avatar.
Penis animated textures broken
Animated textures can be restored by running a simple script from inside of the prim.
default
{
  state_entry()
  {
    llSetLinkTextureAnim(
     LINK_THIS, ANIM_ON|LOOP, ALL_SIDES, 16, 4, 0, 64, 30);
  }
}
Command Info
To enter a command you must put a forward slash in chat following by the channel number /58913 then put a space, after type one of the commands listed below.
Most commands require arguments, each argument is delimited by a space. You can wrap arguments with "" quotes to escape the space delimiter.
Example: /58913 variant Avatar Ears 2 - will play the second ear animation variant.
To get a list of all commands type /58913 help
For expanded information about commands, as well as detailed explanation on how exactly scripts work, we recommend checking our __Source & Tutorials` (button on the left side of this HUD).
Command Cheat Sheet
❗ Only a few useful commands are listed, its not a full list.
Animations script
Command:
startorstop
Arguments:AoName
Starts or stops the AO script.
Example:/58913 stop Avatar- stops playing animations.Command:
variant
Arguments:AoNameSlotVariant
Set a variant number of a slot.
Example:/58913 variant Avatar Ears 2- play the second ear animation variant.
AoName - String to differentiate what script to refer, e.g. "Avatar" or "Penis".
Slot - String of what animation slot to refer to.
Variant - Number index of a variant to play within that slot.
Eyes script
Command:
eye
Arguments:Parameter1Value1...Parameter5Value5...
Set the eye parameter-value pairs, multiple pairs can be sent in one command.
Example:/58913 eye auto 0- eyes won't auto-look same way as camera.
Useful parameters are: Gesture, Flip, Auto, TimerMaxDelay, TimeScale, AmplitudeX, AmplitudeY, NoiseStrengthX, NoiseStrengthY.
For more info about those parameters, check the notecard located in the eyes attachment's inventory.
❗ Only a few useful commands are listed, its not a full list.
Applier script
Command:
out
Outputs the database of all available tags and prim names to chat. Each active Applier script will dump its own database.
Example:/58913 outCommand:
tagort
Arguments:TagNameRuleParams
Sets primitive params of the specified TagName.
Examples:
/58913 tag Face 18 * 0- Hides the face. Changing 0 to 1 will show it.
/58913 tag Face 18 "<1, 0, 0>" *- Tints face red. Put <1, 1, 1> to restore it.
/58913 tag TEXBody 17 "ae2de45c-d252-50b8-5c6e-19f39ce79317"- Sets the body texture to IMG_USE_BAKED_UPPER.
TagName - Name of the tag, for more info check the Applier Guide page.
Rule and Params are set according to llSetPrimitiveParamsFast function.
Putting an * for a parameter value indicates that it should not be changed.
If user doesn't define all parameters, the remaining ones will be unchanged too.
Useful Rules:
TEXTURE: 17, str texture, vec repeats, vec offsets, float rotation_in_radians
COLOR: 18, vec color, float alpha
ALPHA_MODE: 38, int alpha_mode, int mask_cutoff
GLOW: 25, float intensity
NORMAL: 37, str texture, vec repeats, vec offsets, float rotation_in_radians
SPECULAR: 36, str texture, vec repeats, vec offsets, float rotation_in_radians, vec color, int glossiness, int environment